從零開始的React (2) - tsx(html)和css
2025-02-10 03:00
前言
上篇已經建立好專案了,本篇會教你常用的html和css,畢竟前端的基本功就是切版。
修改tsx和css
p.s無論是刪除或者是修改,在改完後記得儲存 ctrl + s,這樣你的畫面才會跟著改變
- 首先把
index.css和App.css裡的東西全部刪除。 - 開啟
index.css,將以下css加入:
css1/*可以讓元素的 width 和 height 包含內邊距和邊框,方便設計*/
2*, *::before, *::after {
3  box-sizing: border-box;
4}
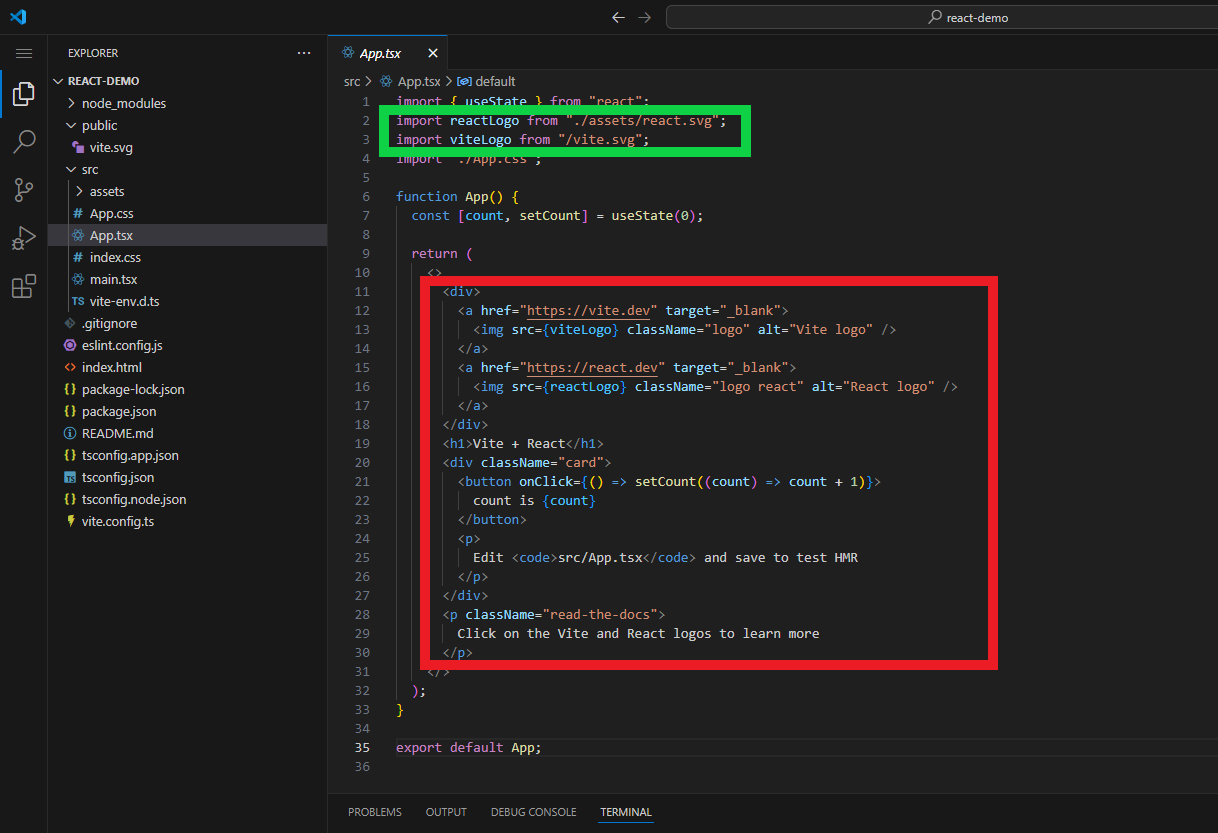
- 開啟
App.tsx,將綠框和紅框的部分刪除,如下圖:
- 接著你會得到下圖,紅框的部分就是React框架中html的部分:
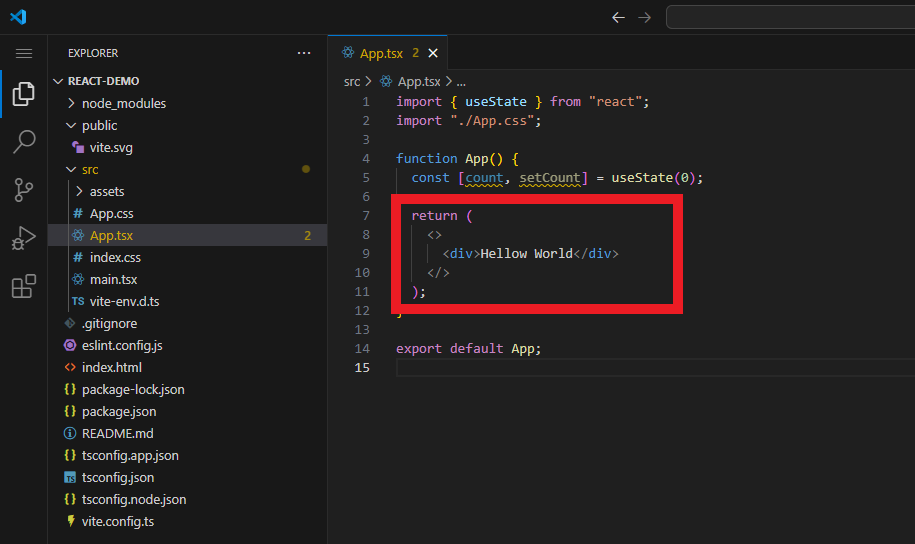
html
簡單來說html是呈現資料(文字)、圖片、影片等等的地方。
修改 App.tsx:
tsx1import { useState } from "react";
2import "./App.css";
3
4function App() {
5  const [count, setCount] = useState(0);
6
7  return (
8    <>
9      <div>Hello World!</div>
10      <div>Hello World!</div>
11    </>
12  );
13}
14
15export default App;
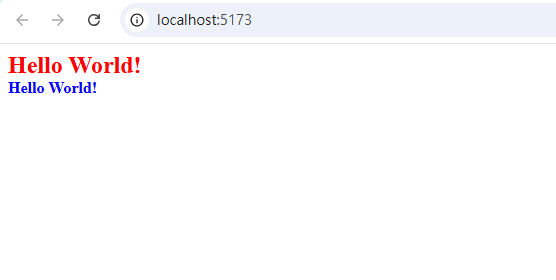
開啟localhost:5173/,你就會看到我們上面加入的Hello World!,如圖:

className
在html中的class,在react裡會寫做className,甚麼是className呢?
就是給你html裡的元素一個類別,讓你的css可以根據各個類別的名稱去做設定,我們來給程式碼設個className,如下:
tsx1import { useState } from "react";
2import "./App.css";
3
4function App() {
5  const [count, setCount] = useState(0);
6
7  return (
8    <>
9      <div className="item1">Hello World!</div>
10      <div className="item2">Hello World!</div>
11    </>
12  );
13}
14
15export default App;
css
css就是用來設定html內元素的字體顏色、大小、背景顏色、邊框等等,下面會介紹一些常用的css並解釋其用途。
- color: 文字的顏色。
- font-size: 文字的大小。
- font-weight: 文字的粗度。
- padding: 元素內的間距。
- margin: 元素外的間距。
- background-color: 背景顏色。
- border: 邊框。
- border-radius: 圓角。
- width: 元素的寬度。
- height: 元素的高度。
- flex: 排版。
接著讓我們嘗試一下,修改 App.css:
color 和 font size 和 font weight
css1/*沒有. 就是針對元素去做設置*/
2div {
3  font-weight: 600;
4}
5
6/*有. 就是針對該className去做設置*/
7.item1 {
8  color: red;
9  font-size: 24px;
10}
11
12.item2 {
13  color: blue;
14  font-size: 16px;
15}
會得到下圖:
padding 和 margin 和 background color
padding、margin這兩個有很多種寫法,這邊以padding來舉例:
padding: 10px;,這樣代表上下左右內間距都為10px。padding: 10px 0;,第一個數表示上下,第二個數表示左右。padding: 0 10px 0;,第一個數表示上,第二個數表示左右,第三個數表示下。padding: 10px 0 10px 0;,這四個數分別代表上、右、下、左。padding-{方向}: 10px;: 也可以單獨針對所需要的方向來做設置。
接著修改 App.css 試試看,下面兩種寫法:
css1.item1 {
2  padding-bottom: 10px;
3}
css1.item1 {
2  margin-bottom: 10px;
3}
會發現無論是哪種程式碼,乍看之下都會一樣,如下圖:
這時候我們將 .item1 加上background-color,這樣就可以很清楚的知道padding、margin的差別了,如下:
css1.item1 {
2  padding-bottom: 10px;
3  background-color: yellow;
4}
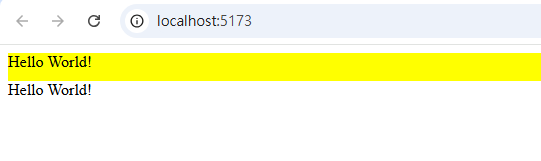
css1.item1 {
2  margin-bottom: 10px;
3  background-color: yellow;
4}

border 和 border-radius 和 width 和 height
馬上嘗試一下,修改 App.css:
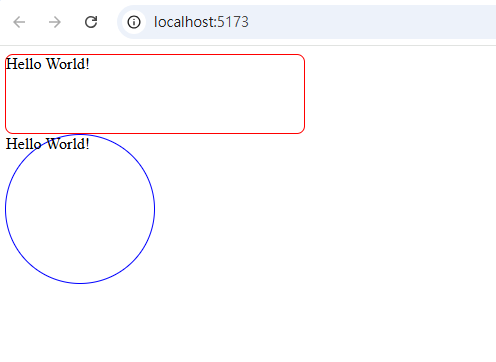
css1.item1 {
2  width: 300px;
3  height: 80px;
4  border-radius: 8px;
5  border: 1px solid red;
6}
7
8.item2 {
9  width: 150px;
10  height: 150px;
11  border-radius: 50%;
12  border: 1px solid blue;
13}
這裡看一下 .item2 只要width、height相等並讓 border-radius: 50% 這樣就會得到一個圓了,如圖:
flex
這是用來布局版面的常用的有:
display: flex;: 賦予該元素flex屬性。flex-direction: 排版方向可以設置為row(橫的)或是column(直的)。justify-content: 以排版方向畫一條線當作主軸,並以主軸為基準來進行排版,如下圖:

align-items: 以主軸的90度來畫一條線當作交錯軸,並以交錯軸為基準來進行排版,如下圖:

讓我們實際試一下,修改 App.css:
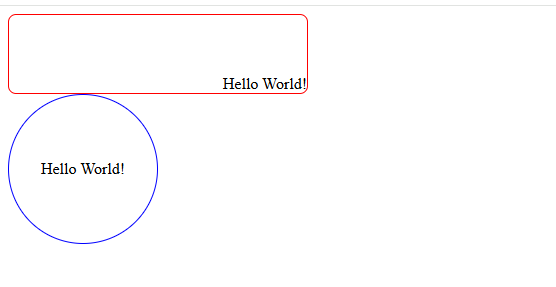
css1.item1 {
2  width: 300px;
3  height: 80px;
4  border-radius: 8px;
5  border: 1px solid red;
6  display: flex;
7  flex-direction: column;
8  align-items: end;
9  justify-content: flex-end;
10}
11
12.item2 {
13  width: 150px;
14  height: 150px;
15  border-radius: 50%;
16  border: 1px solid blue;
17  display: flex;
18  flex-direction: row;
19  align-items: center;
20  justify-content: center;
21}
就可以得到下圖:
最後
今天的介紹就到這裡,html、css在這篇文章中只是稍微帶過而已,讀者可以上網搜尋專門在教html和css的文章,下次見。